Amazon Web Services (AWS) includes a nice web-based console for managing your resources. However, in larger operations, you’ll more likely need to perform tasks programmatically. In this article, we’ll explore how to use node.js to spin up an EC2 instance in AWS.
About the API
Although we’re going to use the node.js SDK, the SDK makes calls directly to AWS via an HTTP REST API. Amazon has been pioneering the REST APIs since its early days; today nearly all of its services—not just in AWS, but throughout the greater Amazon ecosystem—are accessible via REST APIs. You can make HTTP requests to list products for sale on Amazon, manage orders, and more. If you’re curious about that aspect of Amazon’s API, check out the Amazon Services developer page.
The only problem with using these REST APIs is they are, to be frank, kind of a pain in the butt. Ultimately it’s just an HTTP request, but you have to perform a digital signature on the request, and then include that with your call. After you sign the request, you send along to Amazon’s servers using whatever HTTP library you have available. (If you’re using node.js, you might try the request.js library; or if you’re brave, you can just use the built-in HTTP library.)
But there’s an easier way. Amazon provides us with SDKs for accessing AWS. In node.js, the SDK allows us to just make JavaScript function calls, while the SDK itself handles the headache of signing the calls and sending out via HTTP. So from our end, it just becomes a function that we call; that’s much easier, and then we can focus on building our software from a higher level.
Our AWS Learning Process
We’ll approach this in three steps: First we’ll use the web console to create an instance. That will help us see the overall process and note a few items.
Second, we’ll log onto that instance, and install the AWS SDK for node.js.
And third, we’ll write some code that creates some instances. When you do this, though, make sure that you shut down the instances; otherwise, you’ll get charged for every hour they run. To keep things safe, we’ll allocate the smallest (and least expensive) AWS instances available.
Allocating EC2 Instances from the Console
Although you might already be familiar with allocating EC2 instances from the console, you still probably want to go through this section, where I’ll provide some important points on identity, access, and security.
In my previous article about identity access management (IAM) in AWS, we saw that we can assign roles to not just people, but also machines. Therefore, before we allocate an EC2 server, we want to plan ahead and consider what that server will be allowed to do. Today, we’re just making a test server that will run code that will allocate additional EC2 servers; so those are the permissions we’ll provide it, and no more.
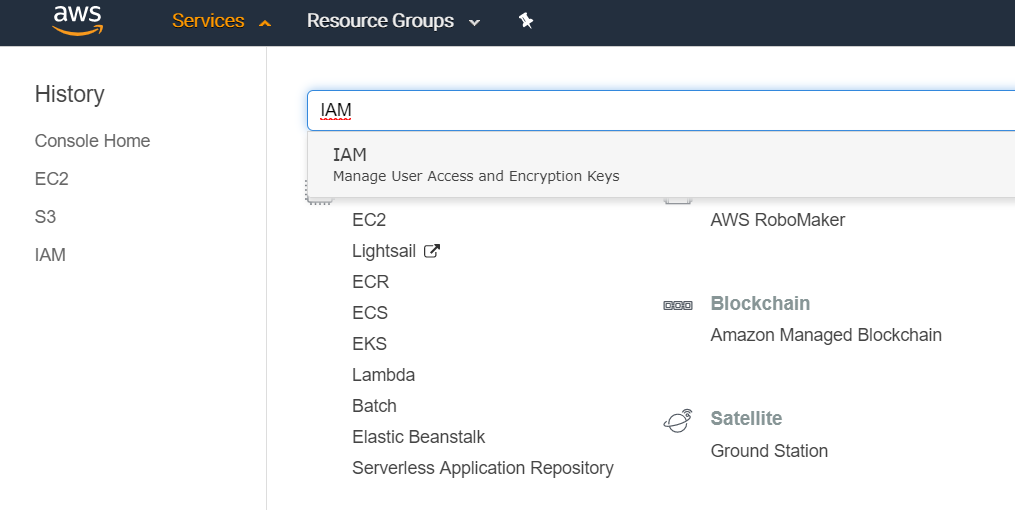
That means our first step is to create a role. Go ahead and log into the AWS console. In the upper left, click the Services menu. In the huge list of services, find IAM (or just type IAM in the search box at the top).
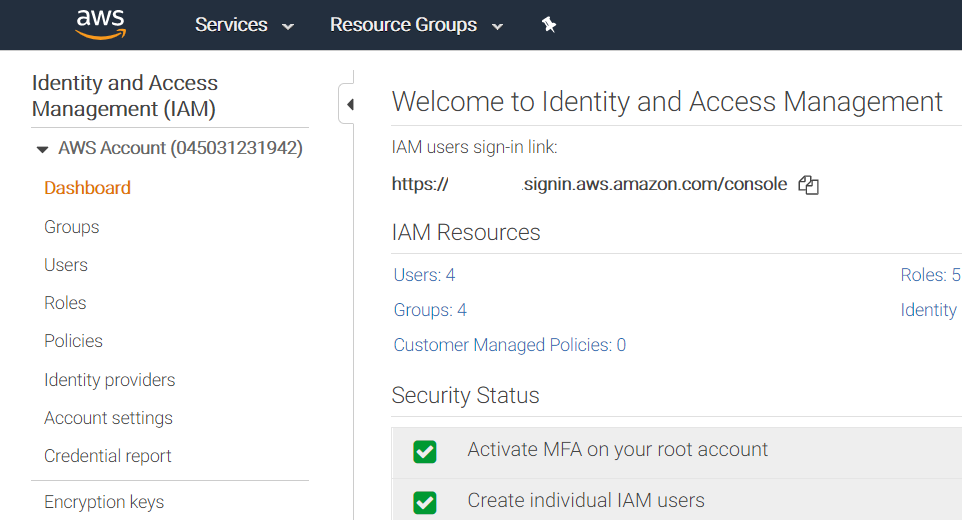
In the IAM console, click Roles on the left:
In the next screen, click the blue “Create role” button. Then, for type of trusted entity, choose AWS Service. That’s because the role we’re creating will be applied to an EC2 instance, which is one of the services, as opposed to a human who would log into the console. Down below, under “Choose the service that will use this role,” click EC2; then click the blue “Next: Permissions” button in the lower-right.
Now we’ll add a policy. We could create our own policy and assign permissions to it; however, there’s already one we can use. But make sure you fully understand how policies and permissions work. For this tutorial we’re going to grant our server full EC2 access. That means any software running on this server can completely obliterate every single EC2 instance in our account.
That’s generally not good. Instead, you normally want to provide only the fine-grained permissions that are required. Read about it here.
But since this is just a quick practice, go ahead and type “EC2Full” in the “Filter Policies” box. This will narrow the search results to a single policy called AmazonEC2FullAccess. Click the checkbox to the left of it. For now, don’t worry about the section called Set permissions boundary (but please study it anyway).
Then click the blue “Next: Tags” button. We don’t need any tags right now. Click the blue “Next: Review” button.
On the next screen, in the Name box, type “Full-Dangerous-EC2-Permissions.” (You can’t have spaces, and most permission names use hyphens, so we will, too.) For Role description, clear out the default text and replace it with something like, “Only use for testing.” Click the blue “Next: Review” button. Finally, click Create role.
We now have our role. The next screen lists all the roles you have created, including this one. Now it’s time to create an EC2 instance.
In the main Services menu, find EC2 and click it. We’re going to create a very small, basic Ubuntu server. Click the blue “Launch Instances” button. In the next screen, scroll down and find the first Ubuntu Server (at the time of this writing it’s version 18.04). Click the blue “Select” box to the right.
On the next screen, for instance type, choose t2.nano. That’s the smallest and least expensive type. Click “Next: Configure Instance Details.” On the next screen, you can accept all the defaults except for one: For IAM role, click the dropdown and choose Full-Dangerous-EC2-Permissions. Click “Next: Add Storage,” and on that screen, leave everything as-is. Then click “Next: Add Tags.”
Here you’ll want to provide a name-tag for your server so you can easily locate it in the instance lists. Click Add Tag. In the left box, type Name. In the right-box, provide a name, such as “Test Launcher.”
Then click “Next: Configure Security Group.” This is another area where we’re going to keep it simple for this tutorial, but for real work you’re going to want to be more careful. Make sure you understand the repercussions of leaving ports wide open to the world.
For now we’ll leave the defaults, which means you can access the server via ssh from any computer. Normally you would only allow access from a limited set of IP addresses, or from a private network. Now click “Review and Launch.” Look everything over, and click “Launch.” Choose an existing key and click the box acknowledging you have it. (If you don’t already have one, you’ll need to create one. Click Create a New Key Pair and follow the steps.) Then click the blue “Launch Instances” button.
The Launch Status page will open. Click View Instances and you’ll go back to your EC2 console where you can watch the instance get created. After the instance is ready and the column “Status Checks” shows a green checkbox, you can log into the server. Now the fun begins.
Logging In
From the EC2 console, click on the new test server; on right side of the bottom pane, you’ll see its public IP address (you want the public one, not the private one). In your Linux or Mac terminal, or from Putty in Windows, ssh into it, using the username “Ubuntu” along with your key file:
ssh -i keyfile ubuntu@publicipaddress
Once inside, we need to get node.js on the server. You have several options here. I usually start with Node Version Manager (found here) and I follow the instructions on that page for installing both nvm and the current stable version of node.
After node is installed, create a directory for your code. Since this is just a test, I’m going to skip the process of creating a node package file and instead just install the packages directly so you can get right to the code:
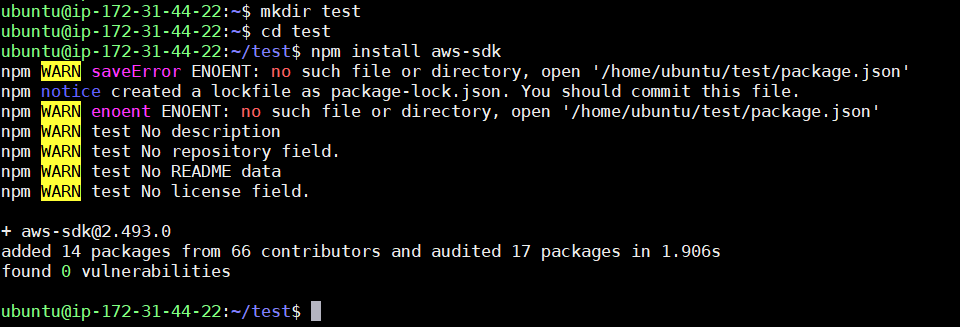
Now use an editor to create a file called app.js, and enter the following code:
const AWS = require('aws-sdk');
const ec2 = new AWS.EC2({region:'us-west-2'});
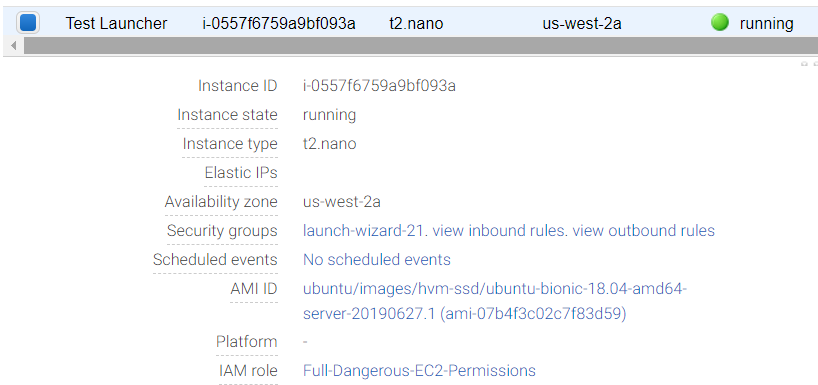
For the region in the second line, you’ll want to use the same region you created your first instance in. Click on the instance in the browser console, and in the lower pane, look for Availability Zone; the part without the final letter is the region (e.g. availability zone “us-west-2a” means region “us-west-2”).
These two lines load the SDK and create an EC2 object that allows us to call into the EC2 API. The object-oriented aspect is a little odd because creating an EC2 object here doesn’t actually allocate an EC2 server instance in AWS; it just creates an object that contains all the functions for managing EC2.
Now we want to effectively do the same steps we did in the web console: We’re going to create a t2.nano instance that has the same version of Ubuntu and the same Full-Dangerous-EC2-Permissions. The API function we use for launching instances is called runInstances. So add the following code after the first two lines:
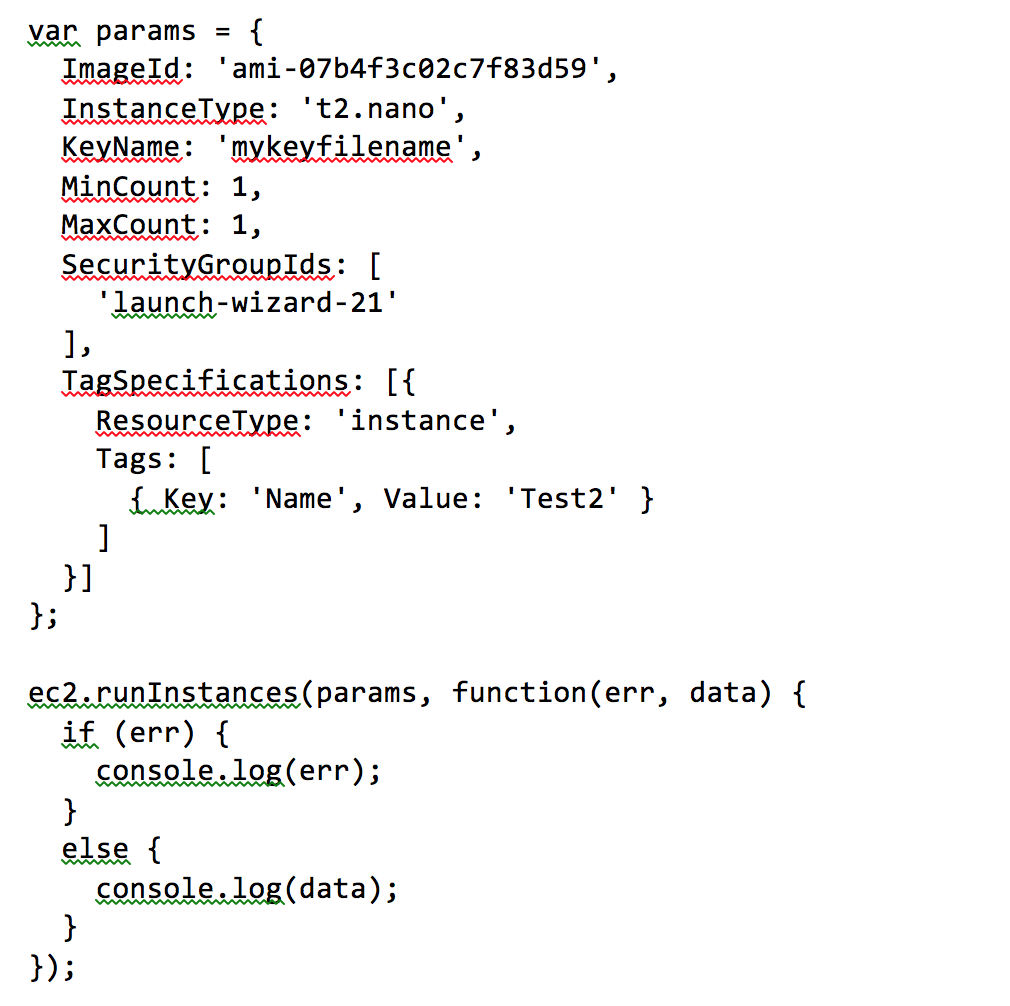
In the params object, replace “mykeyfilename” with the name of the key file you used in the final step of launching the first instance from the console. For ImageId and SecurityGroupIds, you’ll need to look those up. Go back to the browser console and click on your Test Launcher instance. In the lower pane, you’ll see the security group name, along with the AMI ID (it’s the text in parentheses that starts with the lowercase letters ‘ami’):
Exit the editor and run your code:
node app.js
If all is good, you’ll see a JavaScript object printed out that contains information about the new instance. Quickly go to the EC2 console in the browser and you’ll see your instances are indeed being created. It worked!
But what if it didn’t work? You’ll see a detailed error message print out. For example, I left off the MinCount and MaxCount when I first wrote this code. These are required parameters, so I saw a couple errors when I tried to run it:
MultipleValidationErrors: There were 2 validation errors:
* MissingRequiredParameter: Missing required key 'MaxCount' in params
* MissingRequiredParameter: Missing required key 'MinCount' in params
Now how did I know how to construct my params object? I used the API reference. Go here and click API Reference. On the left, scroll down and find EC2, click it to expand it, and then under it click 2016-11-15 (that’s the date of the latest version). In the right pane, you’ll see all the functions available to you, along with a lot of really nice examples. If you scroll down to runInstances, you’ll see an example similar to mine. The nesting of the objects and arrays is a little annoying, but it does make sense. For example, you can have multiple security groups for an instance, so SecurityGroupIds is an array. The member names are always uppercase for some reason.
But remember, the SDK is just a wrapper around the “real” API. For the full reference for EC2, go here; under API Reference, click “PDF.” I use the PDF version because the reference is massive and the HTML one takes a long time to load.
In the PDF version, under Actions in the Table of Contents, you’ll find runInstances. Click it and you’ll go to page 973. Here you’ll find a list of all the parameters, and each one lists whether it’s required or not. You’ll also find some interesting parameters such as DryRun. This one is handy so you can test out your code without actually launching the instance. (Try it! Add the following line before the ImageId line, including the comma, in the above code.)
DryRun: true,
To Role or Not to Role
If you compare what we did to some of the official documentation (such as here), you’ll notice an important difference: The official documentation includes code that loads the credentials from a file. But because we assigned a role to our server, we don’t need to do that. The server running the code already has the permissions.
Shut Down!
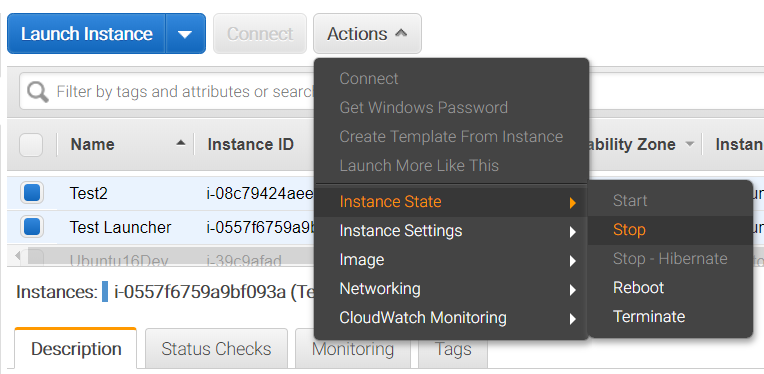
Remember to shut down your instances! You don’t want to get charged extra for forgetting to leave them on. Go to the web console, click the checkbox to the left of the instances, and then click the Actions button. In the menu that appears, click Instance State, then Stop.
Stick around a bit and make sure they really do stop.
What’s Next
We have a bit of a chicken and egg situation here. We created a server that in turn allocated other servers. Fortunately, AWS doesn’t restrict us to running code from our own EC2 servers. We can run code elsewhere, specifically from within Lambda functions. Lambda functions can then be triggered in response to various events. Indeed, when we created our role, although we chose EC2, another option was Lambda. If you want to learn more about Lambda functions, head over to the official documentation.
The API for EC2, like most of the AWS APIs, is huge. There are dozens of functions you can call. You can list all your instances; you can create VPNs; and more (basically, anything you can do from the web console you can do programmatically). The REST API document for EC2 alone is over 1,600 pages, but the functions all follow the same format, and the SDK simplifies the process.
You’re also not limited to node.js. You can use other languages, including C++, Java, and Python. But without a doubt, in all your exploring of the APIs, make sure security is always on your mind. Understand the roles, permissions, policies, and security groups. The last thing you want is your employer ending up at the top of Google News with a story about a company’s data getting hacked because you forgot to set your permissions correctly!