Over the past couple of years, Microsoft has been building up its own app store, just as Apple and Google have done. It supports both Windows Phone as well as the desktop operating system, Windows 8. As a programmer, you can create apps for Windows 8, upload them to the Windows store and (hopefully!) start making money. If you're willing to create apps that make use of the new Windows 8 interface, you can make the apps available for download directly in the store. If you write apps that use the traditional Windows desktop, you can still list them, except you have to host the download elsewhere -- on your own site or some other software site. In either case, once your app is listed, users can use Windows 8's search functionality to find it. In this article I'll show you how to build an app. Then in a subsequent article I'll show you how to list it in the store and configure your store settings. So let's get started building a Windows 8 app that uses the new interface.
The Development Tools
To develop apps for the Windows Store, you need Visual Studio 2012 or later. You can use either the premium versions or the free Express version that's specifically for Windows 8 (I'll be using the premium version of Visual Studio 2012 for these steps, but the Express version will work in essentially the same way.)
Creating a First Project
Start up Visual Studio, and click the menu File -> New -> Project. Depending on the version of Visual Studio and the configuration, you'll see a list of different types of projects. Locate the Visual C# section on the left, and under that, Windows Store. In the center section choose the type Grid App (XAML).
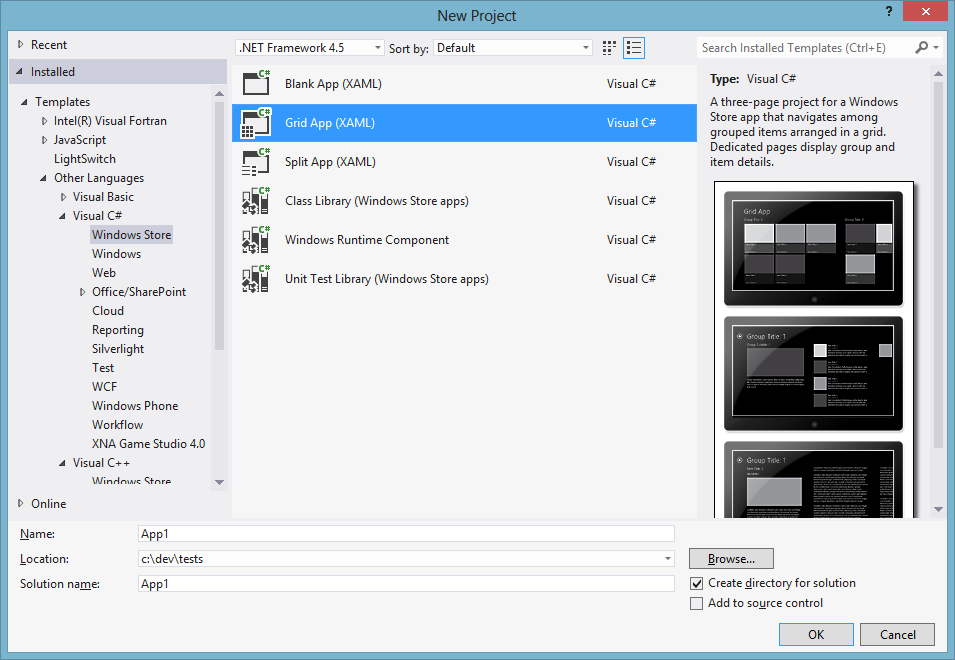
Provide a name for the app, such as FirstApp. If you have a place you like to store your development projects on your hard drive, you can provide that for a location. Otherwise, you can accept the defaults. Also provide a Solution Name. A solution is a set of projects, and Visual Studio will create a subdirectory by that name, provided you check the "Create directory for solution" box. I always do. That way all of my solutions get their own directory. This time I called mine WindowsStore, with no spaces. Now click "OK" and Visual Studio will prepare to create the starting project for you. Next, you'll see a popup message saying you need to get a developer license from Microsoft. 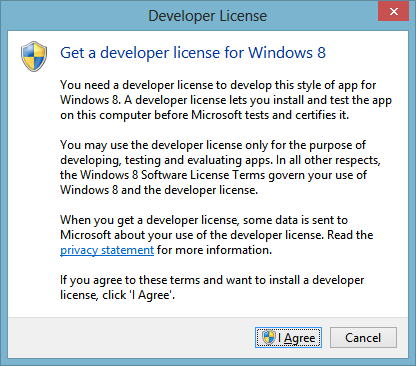 The license is free -- just click through the steps and Visual Studio will connect to the Microsoft servers and automatically get a developer license for you. At one point you'll be asked to sign in with your Windows Live account, or create one if you don't already have it. After that, Visual Studio will create the project. You can even run it right now, although it's filled with sample test data. Try it out: click the menu Debug -> Start Without Debugging:
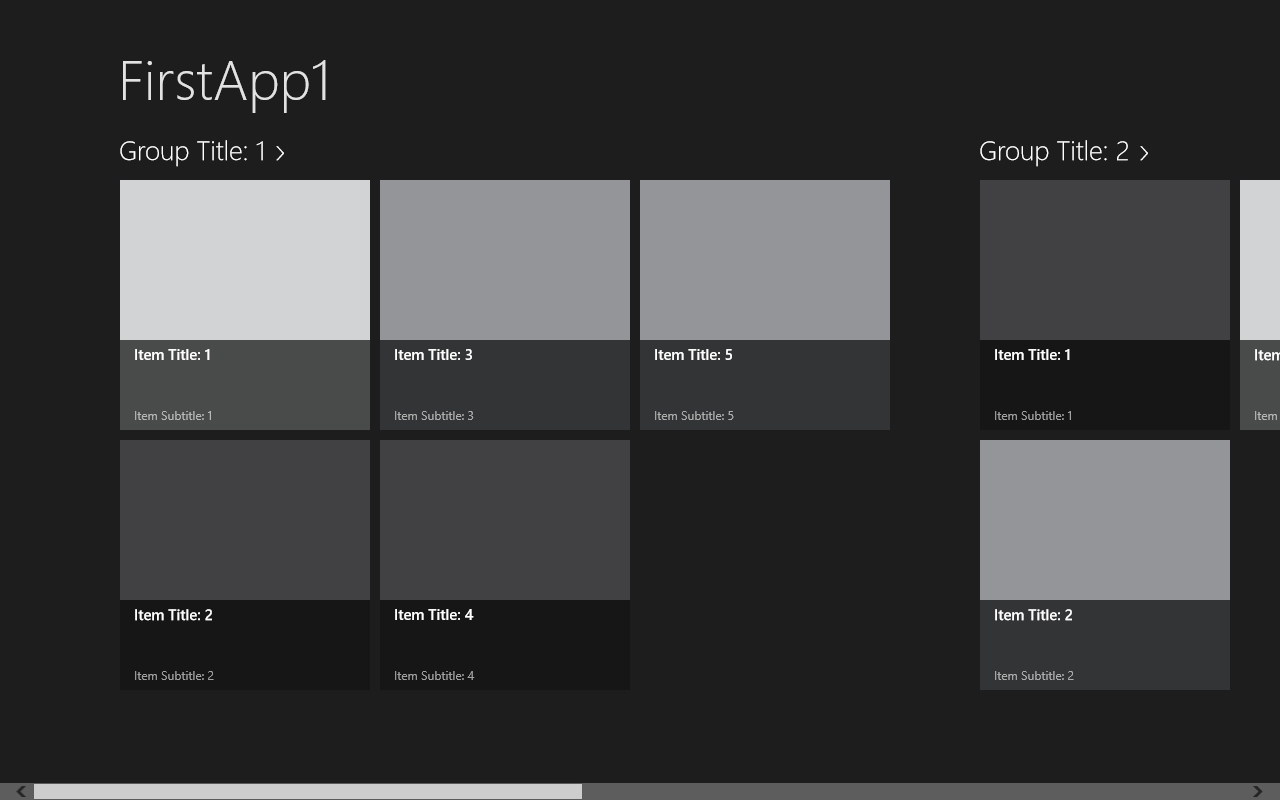
The app has the tiled look and feel of Windows 8. Click on any of the tiles and you'll see the details for that tile's data item. To close the app, either touch or click at the very top and quickly drag downward.
The Data
In Visual Studio, go to the Solution Explorer window (if it's not visible, click the menu View -> Solution Explorer). Expand the folder called DataModel, and double-click the item called SampleDataSource.cs. This file contains the classes that define the data model. The names all start with the word “Sample.” Let's rename the first class from SampleDataCommon to just DataCommon. Go to the line that starts with public abstract class SampleDataCommon and delete the letters Sample. You'll see a little red box appear under DataCommon. Float your mouse over that and you'll see a dropdown menu appear. Click the menu and it should look like this:
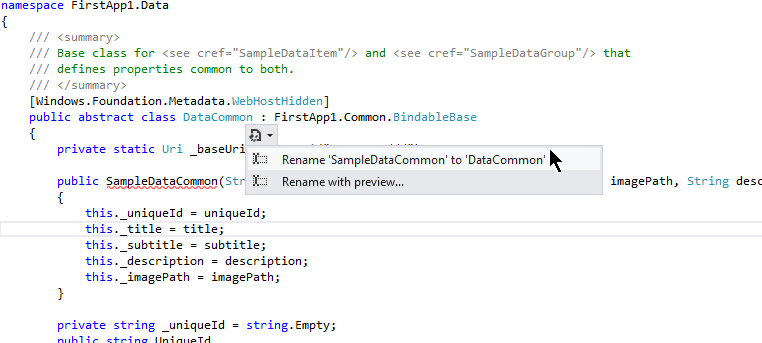
Click the first item, Rename 'SampleDataCommon' to 'DataCommon'. This will rename the word everywhere it's used in the project. You can similarly change the classes called SampleDataItem to DataItem and SampleDataGroup to DataGroup. But leave SampleDataSource as-is, because it really is just sample data. Scroll down to SampleDataSource, and you'll see a whole bunch of lines of code that go to the end of the file and contain sample data like this: 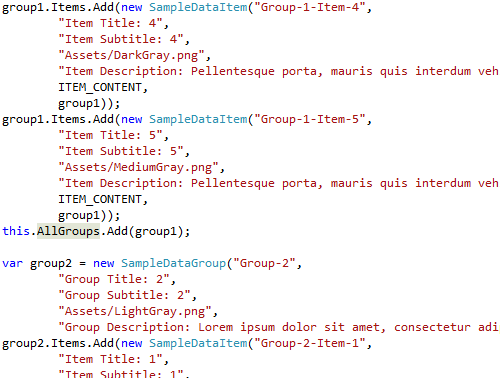 This is where all the sample starting data resides. A real application would likely read this data from a database. That’ll be the topic of a future article, in which we'll grab some live data off the Internet and make an app for browsing real data. As a preview, you can see that there's a list called AllGroups that contains the groups, each of which contains its own list of individual items. You create a new instance of DataGroup, and then fill that with instances of DataItem. Then you add that DataGroup to the AllGroups list.
Conclusion
This is how you start. There's lots more to learn, which we can explore in future articles. Meanwhile, spend as much time as possible going through the code and trying out changes. The more you practice, the better you'll get, and the closer you’ll be to building that first app. Have fun! If you have other tips on building a Windows 8 app, share them in the comments below.