It's hard to believe that as recently as 10 years ago, many bedroom developers hadn't got into using
Version Control Systems. Shamefully, I can remember occasions when I had multiple source versions going and had to struggle to work out which one was the most recent. It was madness and I once lost an important file and then a full day recreating it from scratch. By far the most popular open source VCS is probably Linus Torvald's Git. But for the last five years I've been using
Perforce, an enterprise-quality VCS that's available for free. The version I used was managed by full-time administrators so I only ever had to install the client. If you're working on a desktop PC or networked server box, you'll have to install both the server and client software. Let's get into how you can use it yourself. If you're starting with Perforce -- also called "P4" -- for the first time, it's a good idea to start with its
RTFM documentation. (I'm told that RTFM stands for "Read the Friendly Manuals.) Perforce is cross-platform, so
Microsoft Windows, Linux Mac or Unix versions are all available. I went for the 64-bit Windows for two reasons. First, my Linux box tends to get reinstalled every few months. Second, I have an off-site backup service (Carbonite) that takes care of my Windows box, so it makes sense to include my VCS database in that off-site backup.
Install the Server, Then the Client
There's no point in installing the client until it can talk to the P4 server, but installing the server is straightforward. The only thing I'd suggest is to change the text file editor to anything except Notepad. Installing the client is easy, as well. It's the configuration afterwards that takes a little effort.
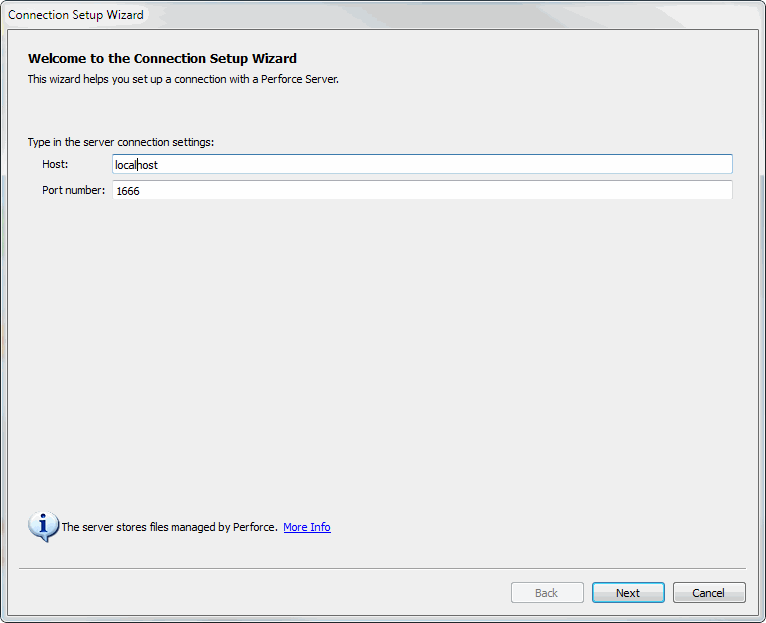
First, your client has to talk to the server. In the host field, fill in localhost if the server is on the same PC as your client. Localhost is the same as 127.0.0.1 and is your PC's IP when you see it from there.
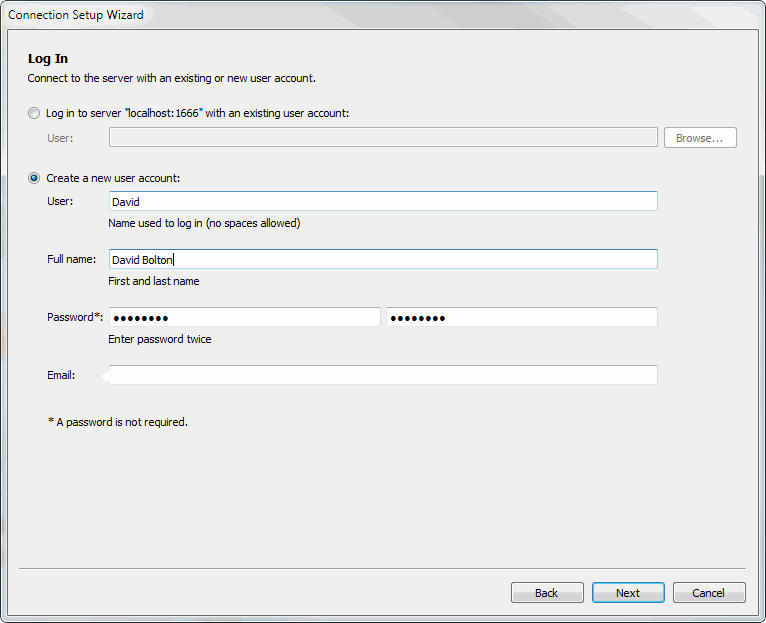
Next, set up a user account, then finally create a workspace on your hard drive with a name and location. Because P4 offers a traditional depot/workspace but streams that are new to me, I stayed traditional. It doesn't let you create a folder, so you'll have to do it externally before you browse to the folder. I have a lot of files that I will eventually move into P4. Rather than work on them in place, I'll locate them all under the one. Over the past year, I've built up a folder called
dice.com and I selected it to import. It imported 103 files, almost 20 MB, and uploaded them to the server in under a minute.
Working on Files
Before you get going here, you'll need a new way of thinking about working with your files. If after you import them their folder vanishes, don't panic. Instead of being on the hard disk, they are now securely locked up in the P4 repository. When you want to work on them you'll have to check them out.

Look at Perforce on the left-hand window. You'll see two tabs.
Depot shows the files in their locked-up state.
Workspace shows them in the location on disk. Click Depot and select a file you want to work on. Right click on it and click
Get Revision. If it doesn't appear, re-do it but this time click the
Force Operation checkbox. You can check out several files at once if you like. If you view files in the workspace location — i.e., where you imported from — in Windows Explorer, they'll show as read-only. You won't be able to make changes until you've checked them out. Now on the right-hand side of the P4 Client, select the Pending tab and right click on
New Pending Changelist. Type in a one-line description, something like "Working on Perforce.txt." Then click the
Save asNumbered Changelist button.
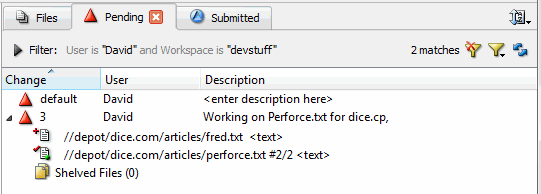
You will now see that on the Pending Tab as a new line with a changelist number. Usually it'll be "2" to start with. If your file has already been imported, then find it in the Depot, click on it and drag it to your changelist. You'll then see a red tick against it. If you want a new file though, create it in the folder, select Workspace then drag it to the changelist. Bear in mind that you won't see it in the Depot because its not in P4 yet. That file should now have a "+" against it. Once a file's been checked into the changelist, it becomes editable. Once you make changes, you can save them by right-clicking on the file in the changelist, then clicking
Diff Against Have Revision. That will show you the differences between the file in the Depot and the version on your disk. Finally, when you want to check the file in, right-click on the changelist or individual files in the list, then click Submit. You might want to right-click
Revert If Unchanged to prune any files that haven't been altered. Don't right-click
Revert and go through with it — that will lose all changes! (Personally, I think having Revert and Revert If Unchanged next to each other is a dodgy design flaw.) On the main menu, click
View, then
Submissions to open a new tab showing all the submissions that have gone in. Those are the basics for working with files in Perforce. One more thing: If you use Visual Studio, Eclipse or Dreamweaver, there are P4 plugins for those as well. In any case, it's an excellent VCS with many other features, and it's enterprise software that's free for up to 20 users. That's a bargain.